Deploying NSX-T 3.2 in my HomeLab Environment

Introduction
NSX-T seems quite daunting in any environment but with a home lab like mine (VMware Workstation + 1 ISP Router) I thought this might not be achievable with the lack of VLAN Tagging and no Jumbo Frames available on my home router. I am not an expert in Networking but I found a great youtube series by Jeffery Kusters located HERE that helps you build a Nested Lab where I managed to get NSX-T functionality.
NSX-T is technology that complements VMware components like Tanzu, Container Service Extension, NSX ALB etc so I thought I should try and implement it in my lab.
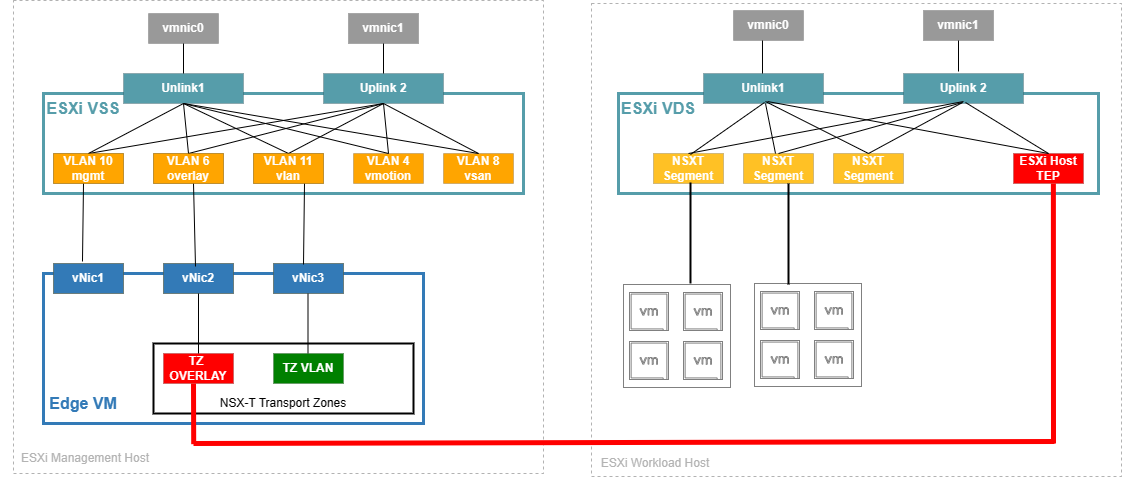
My Lab
I’ll be quick here since this post is about the NSX-T configuration aspect, but to help with that, I’ll give you a rundown of my lab.
I have one host deployed and configured on VMware Workstation with as many resources as possible. This host also has 2 Bridged Network Adapters.
On that host, I deployed a Jumphost/AD/DNS Server and a VyOS virtual router. This VyOS router has 1 NIC connected to my home network and 1 NIC connected to a Nested-ESXi-Trunk (VLAN 4095) port group on a virtual switch. The NSX-T Edge Controller will also be deployed on this host.
On that host, I also have provisioned a vCenter server and 3 Nested ESXi hosts. These hosts will have a Virtual Distributed Switch where our NSX Segments are created.
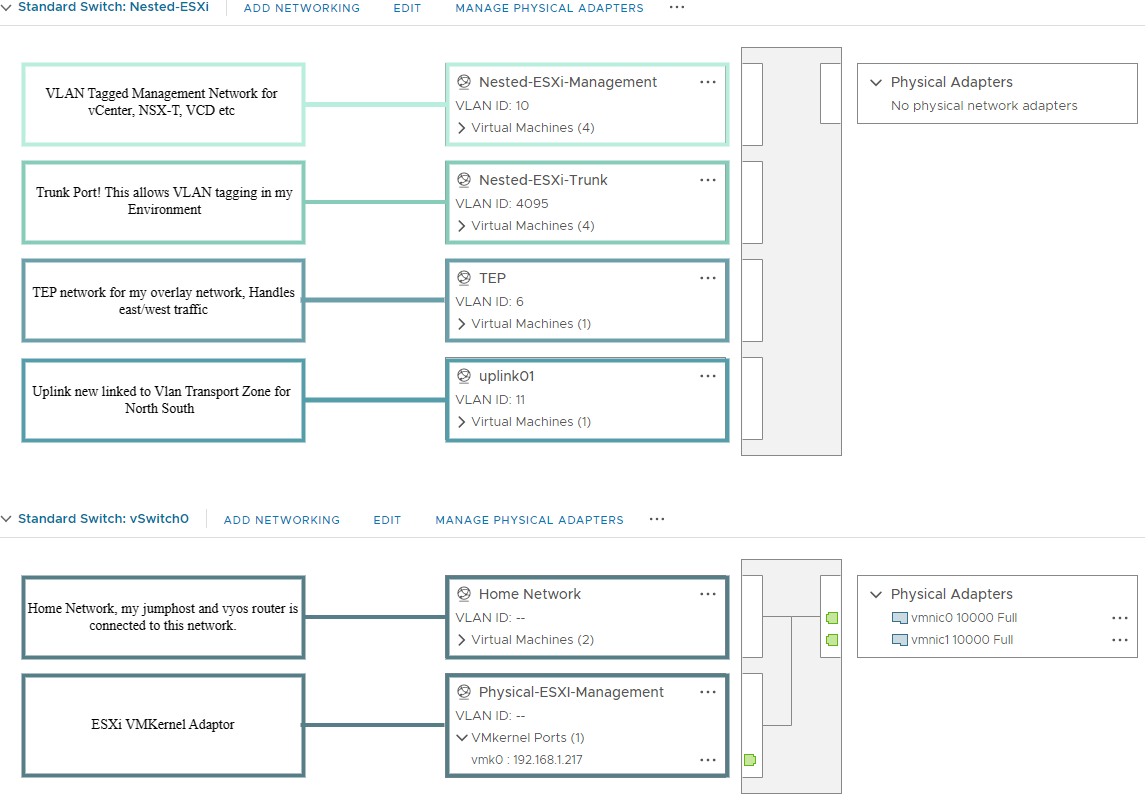
ESXi Management Host
Network config on my Management Host
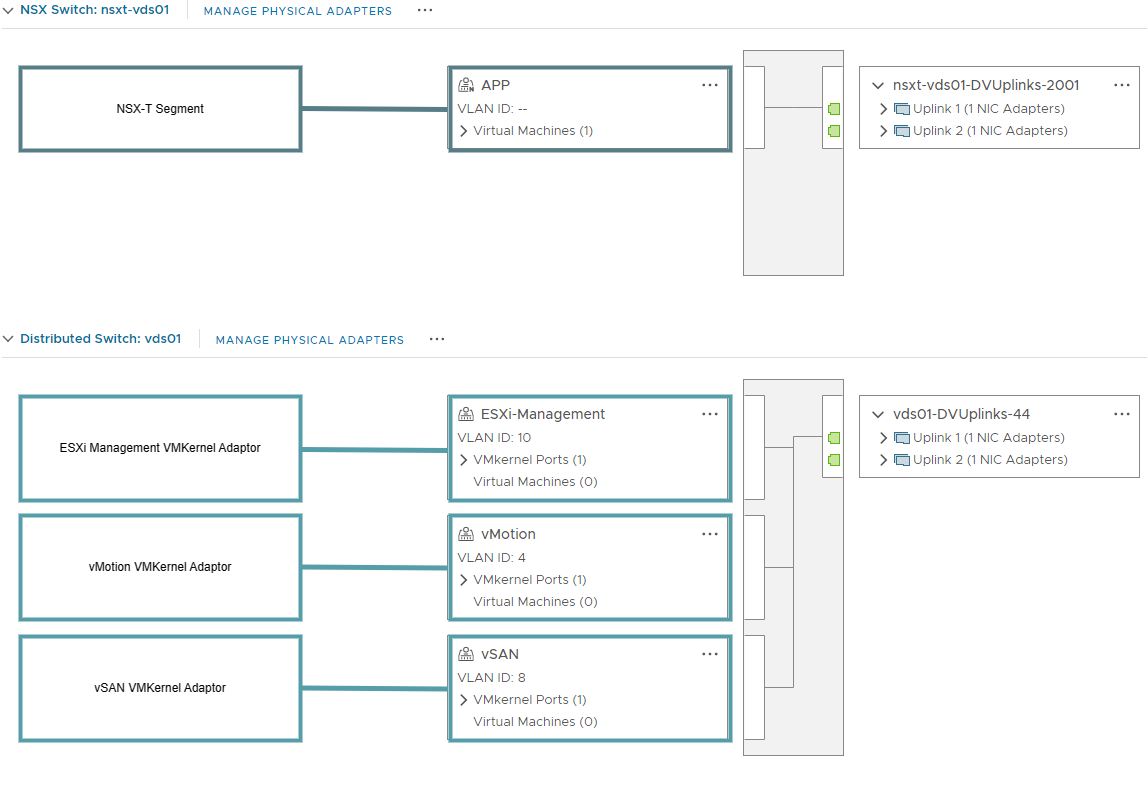
ESXi Workload Host
Network config on my Workload Hosts. nsxt-vds01 is my vds where NSX-T will create segments. vds01 is the vds with all my ESXi Management VLANS/VMKs.
Vyos Virtual Router
My vyos virtual router has the following Interfaces configured.
1
2
3
4
5
6
7
8
9
10
11
12
13
14
15
16
17
18
19
20
21
22
23
24
25
26
27
28
29
30
31
32
33
34
35
36
37
interfaces {
    ethernet eth0 {
        address 192.168.1.145/24
        description Home-Network
        hw-id 00:0c:29:0f:f8:6f
    }
    ethernet eth1 {
        hw-id 00:0c:29:0f:f8:79
        mtu 9000
        vif 4 {
            address 10.0.4.254/24
            description vMotion
            mtu 9000
        }
        vif 6 {
            address 10.0.6.254/24
            description Overlay-TZ
            mtu 9000
        }
        vif 8 {
            address 10.0.8.254/24
            description VSAN
            mtu 9000
        }
        vif 10 {
            address 10.0.10.254/24
            description ESXi-Management
        }
        vif 11 {
            address 172.27.11.1/24
            description VLAN-TZ
            mtu 9000
        }
    }
    loopback lo {
    }
}
NSX-T Configuration
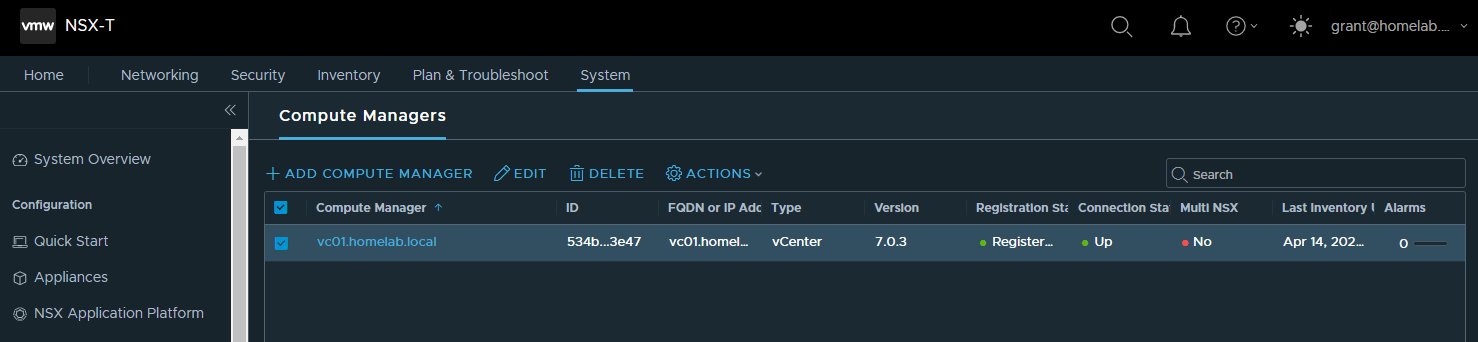
Compute Manager
First thing I did was configure vCenter connectivity. This is done by browsing to System » Fabric » Compute Managers
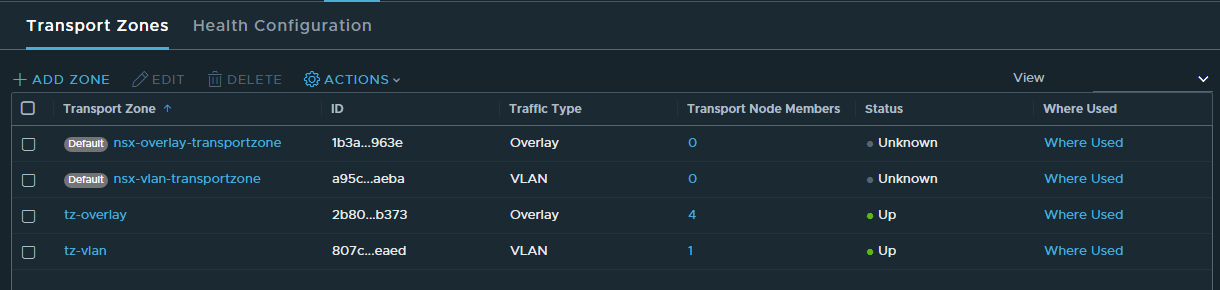
Transport Zones
Next is to create 2 Transport Zones in System » Fabric » Transport Zones. I need one overlay transport zone and one VLAN transport zone.
Uplink Profiles
Next to to create Uplink Profiles (System » Fabric » Profiles), these profiles essentaily map NICs to uplinks in vcenter, you can configure # of uplinks + configure Active/Active or Active Standby Scenarios.
I created 2 Uplink profiles here
- edge-uplink-profile I just need the one interface as this is a lab
- host-uplink-profile I created 2 NICs for my ESXi Hosts to manage my nsxvds switch, i also added VLAN 6 as my transport VLAN

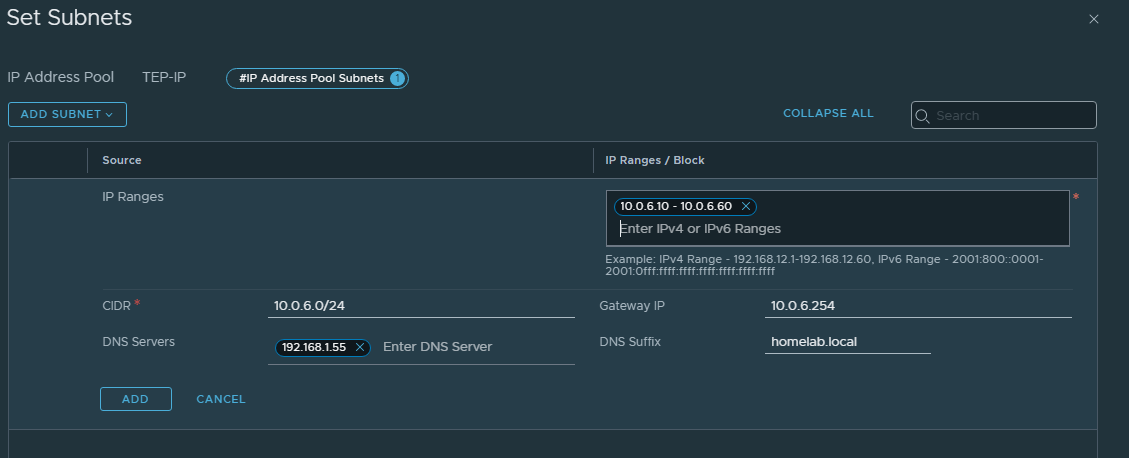
TEP IP Pools
I created an IP Pool (Networking » IP Address Pools) for my VLAN 6 overlay TEP network

Transport Node Profile
I then created a Transport Node Profile (System » Fabric » Hosts » Transport Node Profile) which asks you to create a Host Switch. This is where you tell NSX-T which vSphere VDS it uses, you can also use the N-VDS capability which is a fully managed DVS in NSX-T, this Host Switch configuration Wizard ties the Transport Zones, Uplink Profiles and TEP Pools together.

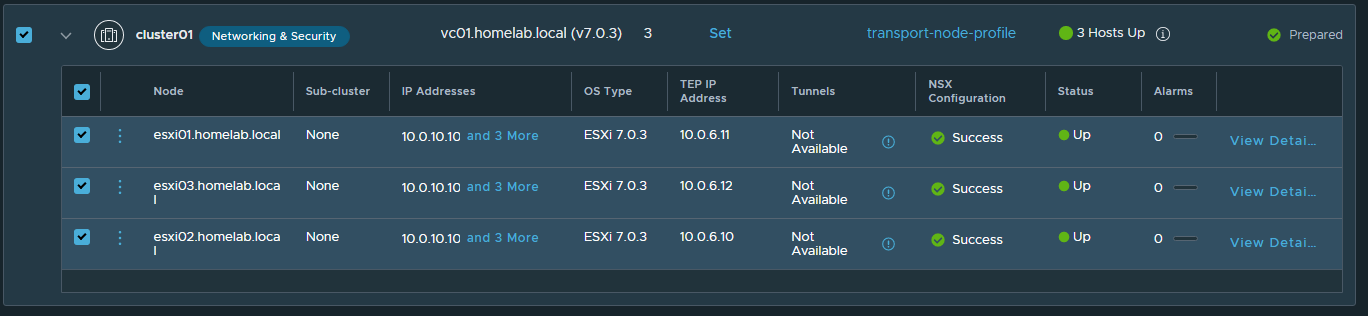
Prepare Hosts
Now its time to configure your vSphere Environment under System » Fabric » Hosts, I configured mine at a cluster level, you should only need to assign the Transport Profile and youre good to go. This will install the NSX-T agent on each host so can take a while.
Conclusion
I have now deployed and configured an NSX-T Manager instance. I then created all the required IP Pools, Uplink profiles, and Transport Nodes to install the NSX agent on my ESXi hosts. Next will be the deployment of Edge Nodes, configure east/west and north/south traffic with Tier 1 and Tier 0 routers with BGP, and create some Segments to test.